I've not blogged here for a few days. Unfortunately my "real job" got very busy. In the meanwhile I received another package of bits I had ordered from China weeks ago and mostly forgotten about ;)
Among other things in this package were some clone Arduino Mini Pro boards. These little boards have a SMD Atmega 328, crystal, LED, caps and a reset button, on a board which brings out all the inputs and outputs to 0.1" pitch. Designed for embedding in small projects, these do not have pins or sockets fitted, but the ones I ordered came with pin strips for both sides and an angled header for an end-mounted power and serial connector. I'm still astonished by the prices of these things. I got five of them for £7.77, with free postage. That's a bit over £1.50 each, no way I could even consider making one for that price.
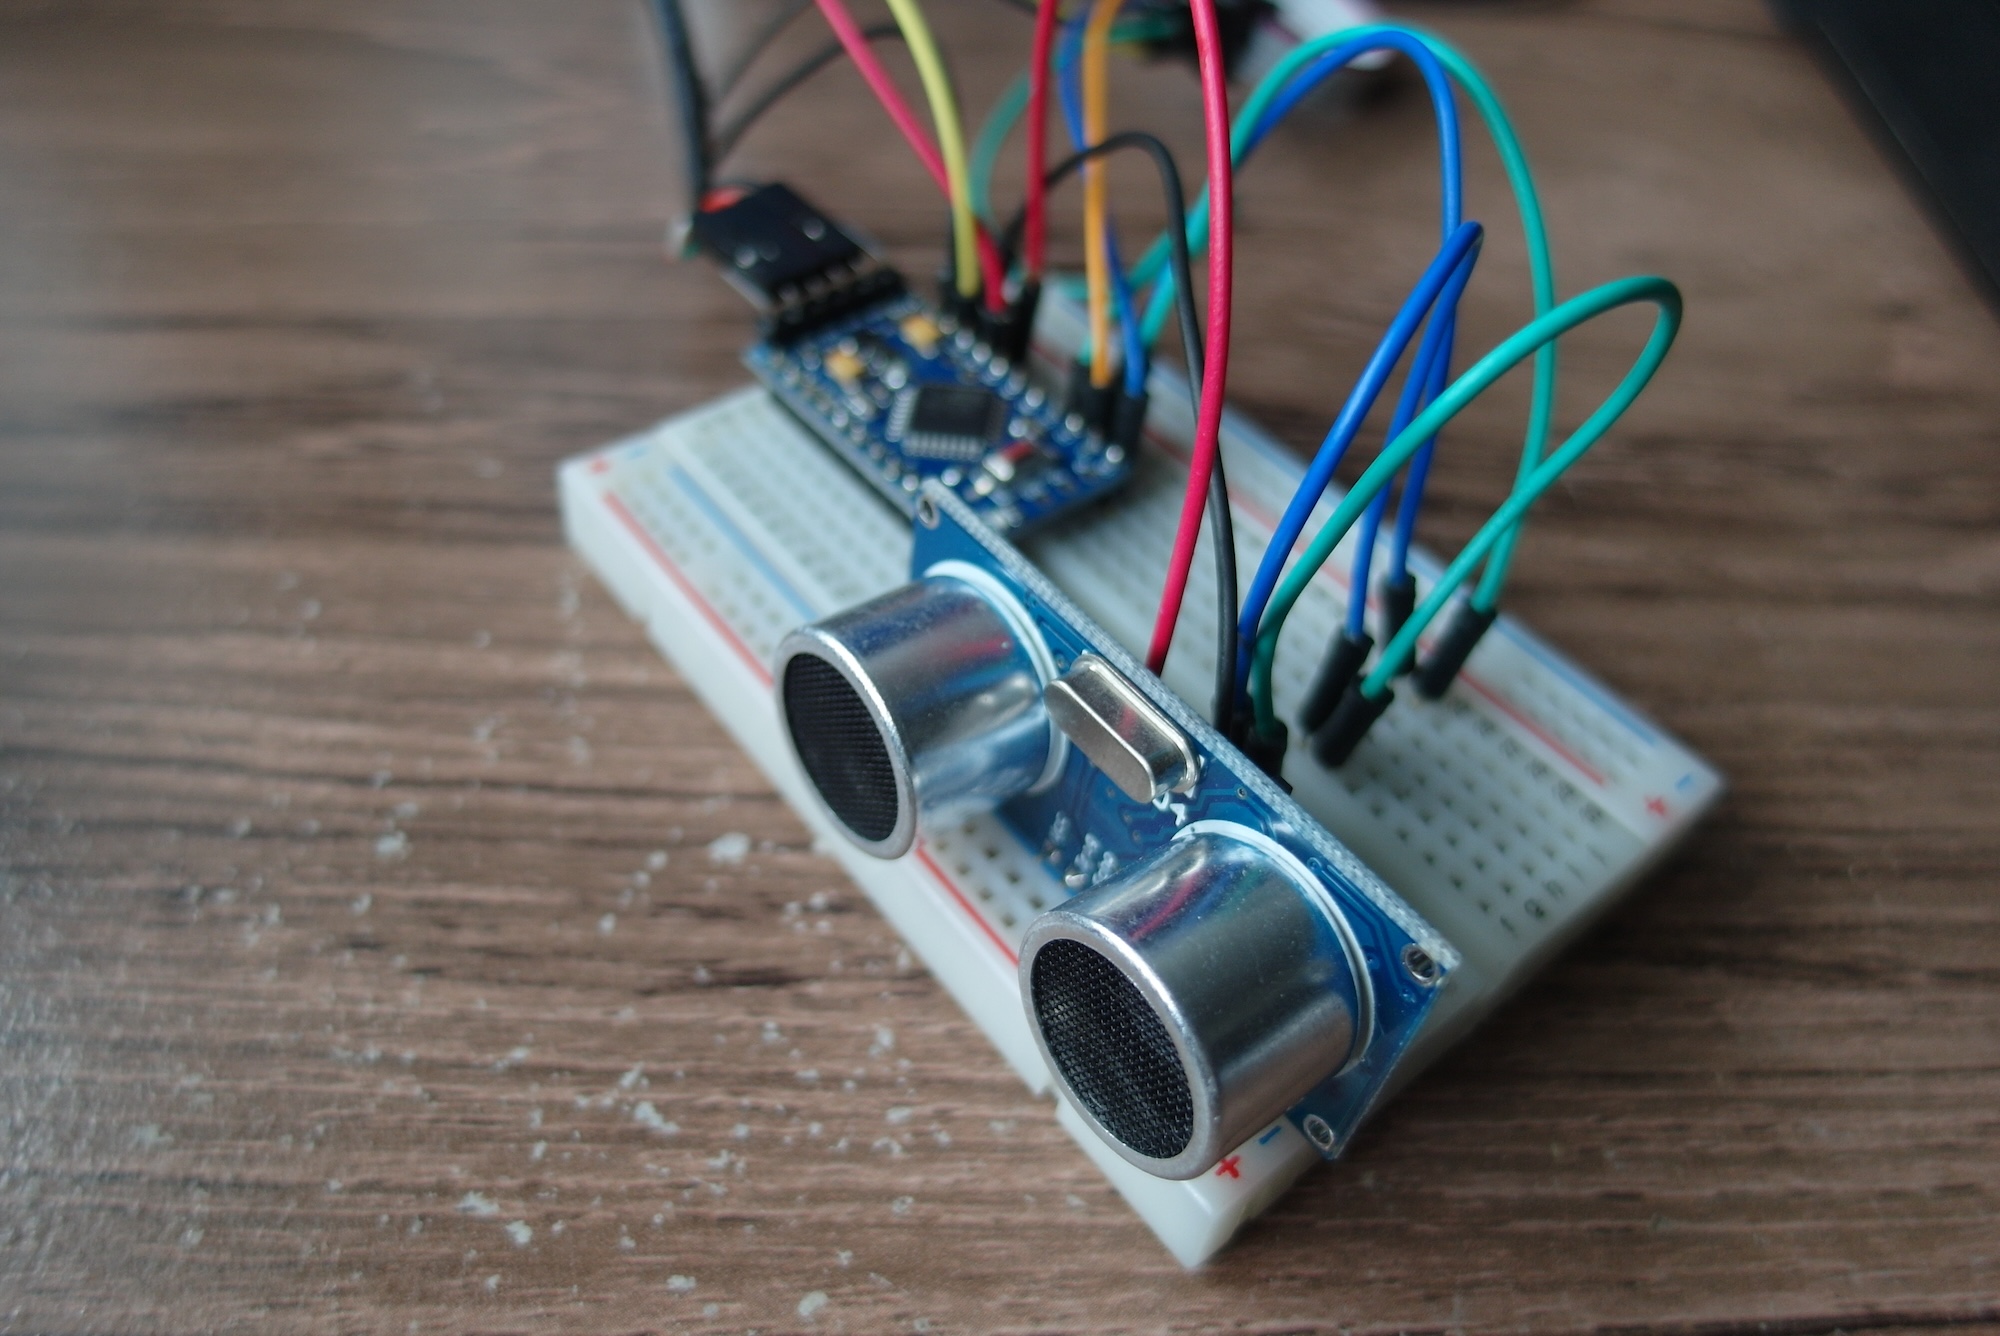
Next, though, I wanted to try out the HC-SR04 Ultrasonic distance sensor boards I got in the same package. These have just four pins on them: the obvious power and ground, and two labelled "Trig" and "Echo". A bit of looking around found a web page with a wiring diagram and example program. I connected up the sensor, simplified the example program a little, and programmed it on to the Arduino pro micro board.
/*
HC-SR04 Ping distance sensor\]
VCC to arduino 5v; GND to arduino GND
Echo to Arduino pin 7; Trig to Arduino pin 8
*/

#define echoPin 7
#define trigPin 8

void setup() {
  Serial.begin (9600);
  pinMode(trigPin, OUTPUT);
  pinMode(echoPin, INPUT);
}

void loop() {
  // send a pulse on the trigger pin to initiate measurement
  digitalWrite(trigPin, LOW);
  delayMicroseconds(2);
  digitalWrite(trigPin, HIGH);
  delayMicroseconds(10);
  digitalWrite(trigPin, LOW);

  // the length of the pulse on the echo pin is proportional to the distance
  long duration = pulseIn(echoPin, HIGH);
  long distance = (duration/2) / 29.1;

  if (distance >= 200 || distance <= 0){
    Serial.println("Out of range");
  }
  else {
    Serial.print(distance);
    Serial.println(" cm");
  }
  delay(500);
}
However, there's a gotcha. The code sends its output over the Arduino serial port, so the user can see the results on a terminal emulator. Unfortunately, because I was connected to the device using an ISP, there was no serial connection. So I could not see whether it was working or not.
The next step, then, was to connect the serial pins to a USB/serial adapter. I found one attached to a Raspberry Pi and connected it to the serial header conveniently placed at the end of the Arduino board. Once the PC had recognized the USB device, I could open up the serial monitor in the Arduino IDE and see the reported distance values. Looked roughly accurate too!
At this point there really seemed to be to many wires, so I took the opportunity to use the USBTiny to write a bootloader to the AVR chip, so next time I can just connect the four wires from the USB/serial connector and take care of all the programming and serial I/O.
So far I am pretty impressed with both these items. the Arduino Pro Mini is so small and (most importantly) so cheap that I can really see myself building it into all sorts of projects. It's especially nice that it does not come with the pins attached, so it can easily be wired direct