I have had a few weeks off from electronic tinkering and from posting here, but I'm hoping to ramp up my post schedule again.
Today I picked up my new Beaglebone Black. On "paper", both this and the Cubieboard seem to be serious competitors of the Raspberry Pi. They are around the same price, and have arguably similar or even better features.
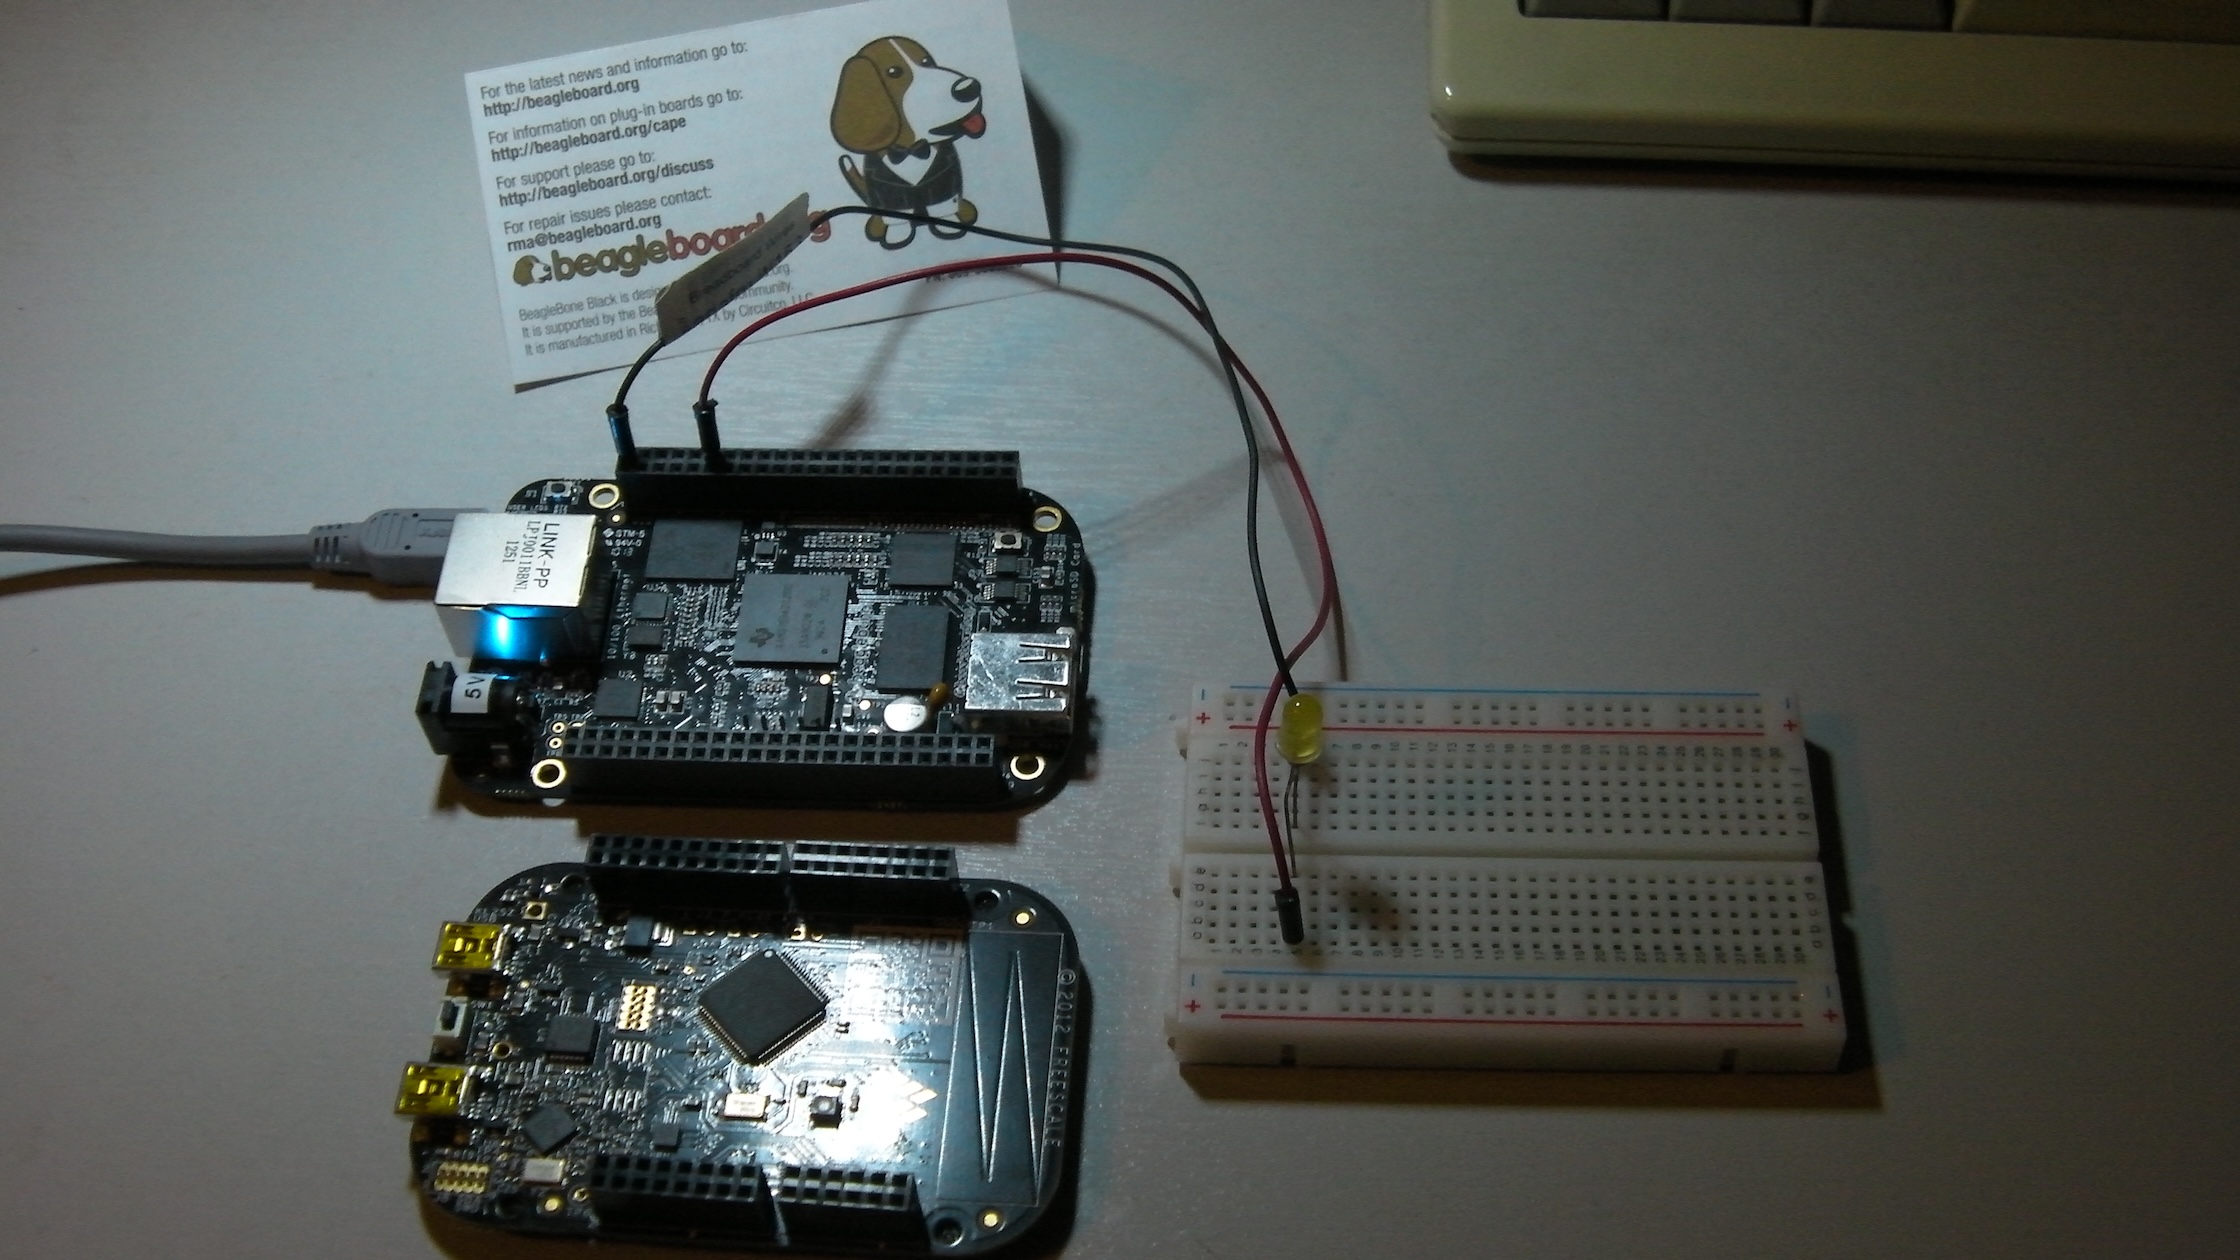
The picture shows the new Beagleboard blinking an LED. For scale, the board is shown next to the similar-looking but marginally smaller Freescale Freedom KL25Z.
The big difference between the three boards is not the hardware, though. The Raspberry Pi has a huge following, which translates into tons of documentation and support all over the web. Tutorials to get you started, and APIs to keep you going are both easy to find. This is not so true for the other two boards.
For example, when I opened the Beagleboard box, inside were the board, a USB lead, and a small card with some URLs on. The first one I tried gave me no response, although that may have been a glitch, as it seems to work now. Eventually, though, I found a "getting started" web site which walked me through setting up USB drivers and so on. This page also pointed me at the default web interface for the board itself which led me on further.
I must say at this point that I am very impressed by the USB drivers for the Beaglebone Black. Once instaLLed, the USB cable serves multiple duty as power, network, mass storage and even a serial port. This is even more clever than the implementation on the Freescale Freedom boards, and streets ahead of the Raspberry Pi which can be surprisingly difficult to connect direct to a PC.
Also note that the Beagleboard Black (like the Freescale Freedom and Arduino boards) comes with built-in flash memory, so you do not need to write an SD card - the board is ready to go immediately. The down side with this is that it's relatively easy to mess it up, and you can't just swap to another fresh card to start again.
Programming the Beagleboard Black was a bit of a challenge. As I have mentioned before I consider flashing an LED to be the "hello, world" of embedded programming, so I set out to do this with the new board. Initially things seemed positive: the web interface provided a link to "Cloud 9", a fairly simple web IDE complete with example code to get you started. I had a quick look at the examples, which looked vaguely like Arduino code, then decided to take the interactive "tour" of the IDE. This was a bad idea, as the tour somehow managed to delete the very example file I was looking at, and I could not find any way of getting it back!
Luckily, after some searching I did manage to find a tutorial with an example which flashes one of the four user-addressable on-board LEDs:
var b = require('bonescript');

var state = b.LOW;

b.pinMode("USR0", b.OUTPUT);
b.pinMode("USR1", b.OUTPUT);
b.pinMode("USR2", b.OUTPUT);
b.pinMode("USR3", b.OUTPUT);
setInterval(toggle, 1000);

function toggle() {
    if(state == b.LOW) state = b.HIGH;
    else state = b.LOW;
    b.digitalWrite("USR3", state);
}
Unlike Arduino and Freedom boards which are comonly programmed in C/C++, or Raspberry Pi which suggests Python, it seems that the intended user language for Beaglebone is JavaScript! This was a bit of a surprise. I was expecting at least some information about how to control the board in C, but so far I have not found anything at all.
Having shown that I could flash the on-board LED my next step was to try and flash an external LED using some GPIO twiddling. I though this would be simple, but it turned out to take me most of the evening to get it working. The main problem is that it's not at all obvious what the pin names should be. Most of the supplied examples use the same "USRn" as above, but that's clearly not how the header pins are named.
First, I searched around for diagrams of the pins. The Beaglebone has two main headers each with 46 pins, plus a few other oddments. This is a lot more than the Raspberry Pi and even more than the Freedom and Arduino boards. Even with all these pins, it seems as though they are mostly used for several things, though. I found what appeared to be a pin diagram, but when I tried to use any of these names the JavaScript gave all sorts of errors. I found a few more which had similar names, and even some with different (but also unusable names). Finally, I found a blog post with the real Beagleboard pin names. I was at least able to get the code to run. Choosing which pin to use was another problem, though. ALthough the diagrams I had found seemed to imply that most of the pins are GPIO, it seems that the default OS sets up many of them for other uses. I haven't yet found out how to control which option to use, so I looked for a pin which was only used for GPIO.
I settled on Pin 12 of Connector J8. This is known either as GPIO1_12, P8_12, or GPIO_44. The final code which successfully flashed the attached LED was:
var b = require('bonescript');

var state = b.LOW;
var led = "P8_12";
b.pinMode(led, b.OUTPUT);
setInterval(toggle, 1000);

function toggle() {
    if(state == b.LOW) state = b.HIGH;
    else state = b.LOW;
    b.digitalWrite(led, state);
}
I'm sure that there is some sort of model which underlies all this naming, but it seems astonishing that it should be so hard just to find out how to control a GPIO line from the supplied programming environment. I would like to try some C programming but I shudder to think where I might have to look for C APIs!